How to Find Water and Filter and Purify or Distill Using the Sun
Knowing how to purify water will save your life.
You may think that because you are miles from civilisation that any water source would be safe to drink but this is not the case.
After obtaining shelter, water is your next priority and regardless of your current supply, you should begin immediately securing a source.
In most cases, you will have to filter and purify any surface water source you find in a wilderness environment.
Surface water sources are contaminated by animal faeces, birds, insects and animal carcases and by humans as well.

The water source will contain harmful bacteria, parasites and pathogens that will cause illness or worse. The water must be filtered and purified before it would be considered safe to drink.
Acceptable methods of emergency water purification include, chemical treatment using iodine or chlorine dioxide tablets, or sodium hypochlorite (liquid chlorine), by boiling the water or by using a portable water filtration system.
Basic Layer Filter
 Not only must you know how to purify water you must also learn how to filter it properly first.
Water must be filtered to remove waterborne cysts that can harbour and protect bacteria from chemical treatment or even boiling. The cysts can be described as micro sized seedpods that can withstand high temperatures. Filtering will remove these cysts along with pesticides, herbicides, sediment, insects and other debris.
Filtering mediums include charcoal, sand, gravel, cloth, cheesecloth and coffee filters. Layer the filtering mediums with the finer material as the bottom layer to filter out the microorganisms.
Use any food can with a hole in the bottom, plastic soda bottle or any suitable device that did not contain chemicals or other toxins.

Next, pour the water into a vessel for boiling or into your container for chemical treatment.
Allow the water to rapid boil for one minute if at sea level and if you suspect you are above sea level boil for three minutes. Water boils at a lower temperature at higher elevations because of the reduced air pressure thus, the extended boil time.
Boiling longer than the recommended times will cause you to lose water volume through evaporation; this can be problematic if you have a limited source.
For every 152 meters / 500 feet above sea level, water’s boiling point is reduced by one degree.
Before setting out on any outdoor adventure make sure, you know how to purify water before you find yourself in a survival situation.
Finding Water
You now know how to purify water but before you can get started, you have to find water first. You may not always have a river, stream, lake or pond next to your campsite in fact you may have to dig for it or collect it using other methods that will be described but first how to dig for water -
 Dry wash or shallow gullies can be a source of water, particularly if there is green vegetation along the sides. These washes usually have water flowing at various times. In the dryer seasons, the flow diminishes or stops completely but there can be water just below the surface.

Note the green vegetation in this arid environment. The plant life could not survive on the rock outcropping unless there was a water source just below the surface. You may find a natural spring is seeping through a fissure in the rocks and is filling up a small cistern. In years past people constructed cisterns to collect spring water, pooled water made is easier to collect. Any water collected from a cistern must be purified; animals will use the source as well and will have contaminated it.
Solar Water Distillation and Transpiration


Transpiration simply means to lose water vapour.
Plants lose water vapour through their epidermal pores or their stomata located on their leaves. Technically this a gas exchange in plants.
Plants absorb carbon dioxide and through transpiration exchange that gas for oxygen, which is present in the vapour they lose through their stomata.

Plastic bags a weight (small stone) for the bag and some string are needed to collect water using this method.
The vapour given off by the leaves will condense on the sides of the bag and drip toward the weight placed in the bag.
Clear plastic is ideal because it allows the sun’s rays to strike the leaves.
This is a way to collect moisture from the soil using a solar water distiller. Materials needing are a digging tool, collection cup, sheet of clear plastic and a small rock for a weight.
Evaporated water is purified so you do not need to know how to purify water collected with this method.
Dig out a small depression and make sure the plastic can cover it with plenty of overlap on the sides. Once excavated place a collection cup in the centre of the depression and fill the hole in with green vegetation.
Place the plastic over the top and secure along the sides with the excavated soil or rocks.
Place the small rock over the collection cup that is under the plastic and put a small hole in the plastic over the cup. The weight creates a depression to allow water to flow toward the hole.
The sun will essentially “sweat” the moisture from the soil and vegetation. As the moisture evaporates, it will condense on the top side of the plastic and begin to flow toward the hole and begin dripping into the collection cup.
Portable Water Filtration - Where Prepping comes into its own.!
If you are able to prepare for a situation that requires raw untreated water to be filtered and left safe and sterile for drinking, then it is always advisable to carry a portable water filter in your backpack. In fact you can also get a water filter drinking straw which will give you safe drinking water direct from a water source. [not sea water].
These other ‘instant safe drinking water filters’ offer safe, clean, drinkable water but without the hassle of all of the above methods.

Modern water purification makes drinking safe water easy for everyone, regardless of your skills level.
Provided you can find a water source, you will always have clean, safe water to drink and survive.
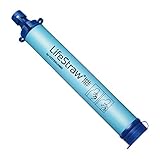
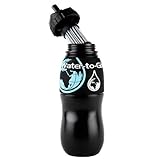
Here's three of the very best water bottle filters on the market today
All three of these portable filter bottles are capable of removing 99.9% of microbiological contaminants. Thats waterborne bacteria, parasites, protozoa and pathogens, plus any metals and chemicals.
In fact, from a prepping and survival point of view these filter bottles are a 'must have' to add to your survival kit.

Want to know about these water filter bottles? Click links below for my video reviews
- See my full video test and my full review of the LifeStraw Filter here
- See my full test and review of the Water to Go Filter Bottle here
- See my full test and review of the Lifesaver Bottle here
Learning how to purify water is not complicated and the methods described are relatively easy to accomplish.
In some cases, you will have to be prepared by having certain materials with you or have the ability to find those materials in your environment.
Foraging can result in you finding what you need, such as discarded metal cans or other vessels to boil water in and discarded plastic shopping bags that can used to collect water from green vegetation
Knowing as many of the old bushcraft water filtering methods is essential for all preppers.
But we are in the 21st century folks..!
Modern water filters are the way to be fully prepared.
Don't get caught out - get prepared first.
Happy Prepping Folks.
Steve

Keep updated with all the latest prepping news and information
* Enter your name & a valid Email address
* You will receive an Email titled 'Preppers Newsletter Subscription'.
* Simply confirm to have access to our regular newsletter and also get your free PDF copy of: 'Beginning Prepping'

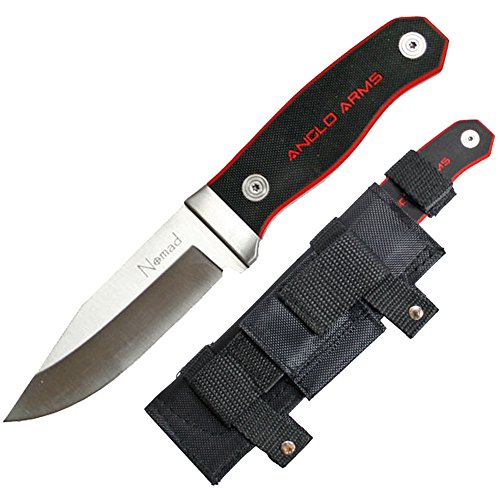
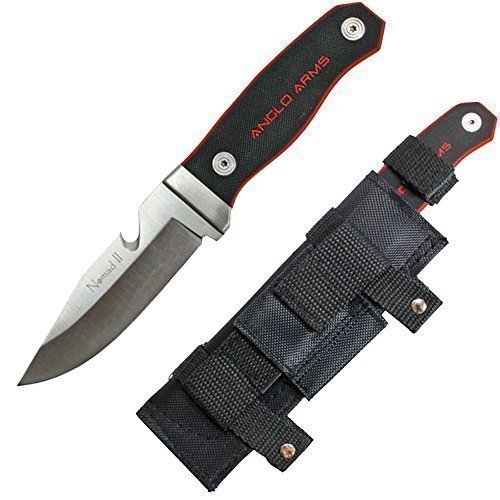
The Best 'Value For Money' Bushcraft Knife
If your searching for a good quality, well made bushcraft knife, that offers great value for money, then look no further
This is the Anglo Arms 'Red n Black'
I have been amazed at the quality of this knife – it is genuinely worth a lot more money and I think you would be hard pressed to find anything that gets anywhere close. These are the details:
- Full Tang Knife
- 420 stainless steel
- 3.7mm Blade Thickness
- Clip Point Blade
- Scandi Grind
- Removable 2 Tone G10 Handle Scales
- Weight: 277 grams (9.77 oz)
- Blade Length: 97mm (3.82 inches)
- Overall Length: 214mm (8.43 inches)
- Nylon Sheath - Belt Clip
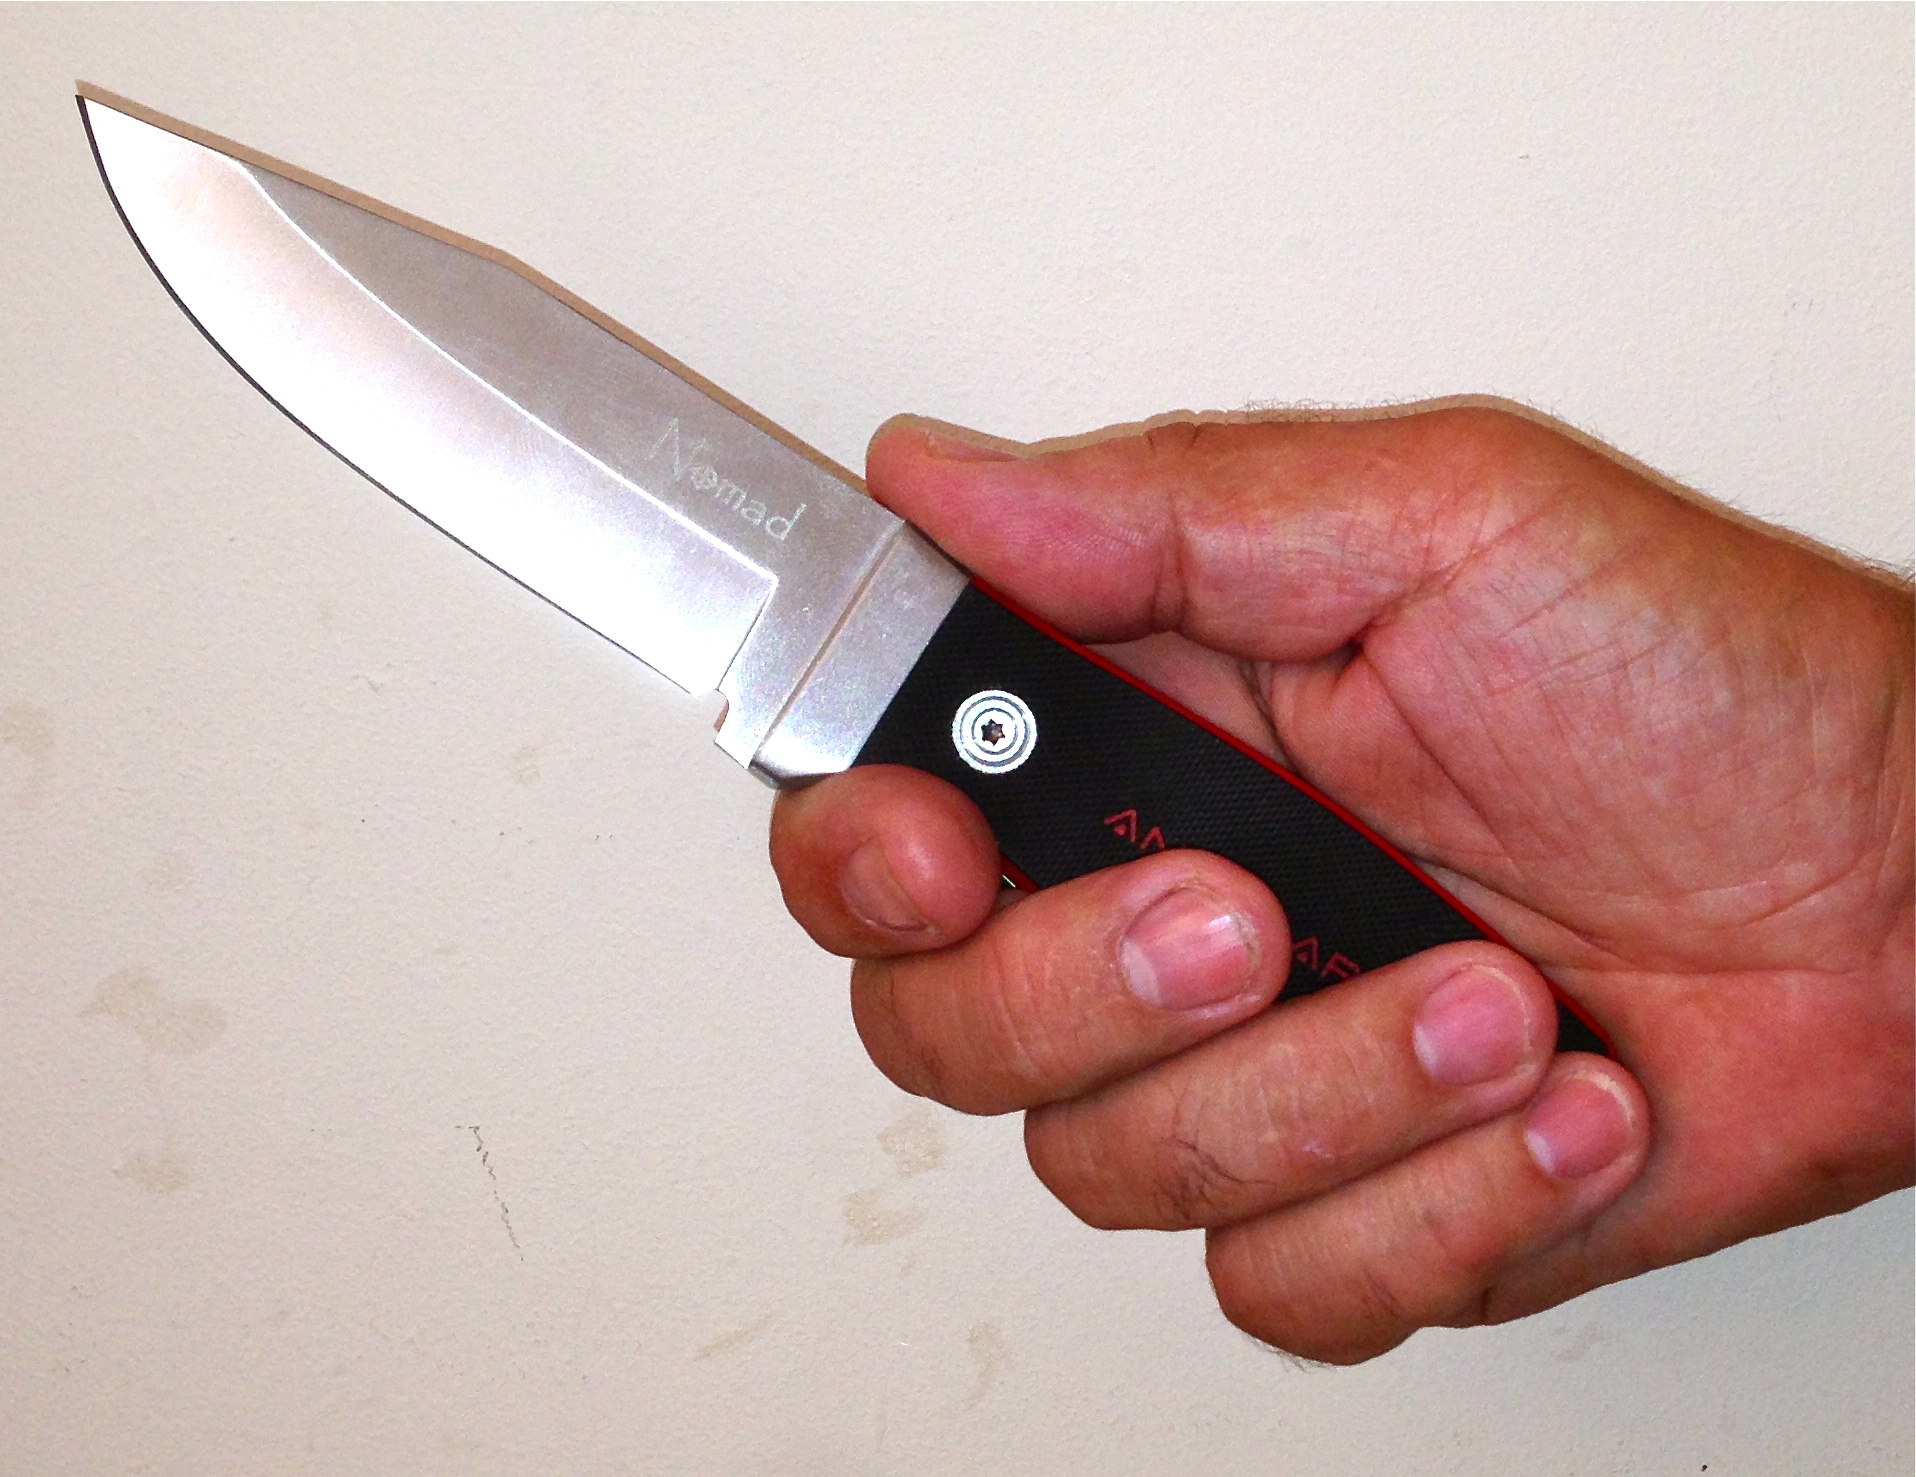
A perfectly balances and very comfortable knife - the perfect size for all bushcraft jobs.
I will keep the best bit to last, namely, the price – so hold off skipping to the bottom of the page to see what good value for money this knife really is.!
This is One Solid Bit Of Kit


What makes this the best value for money bushcraft knife
My First Impressions:
The first thing that stuck me about this knife is the build quality - everything feels solid.
I especially like the G10 handle scales. The more knives with the G10s that I handle the more I like this material.
- Also, on this Anglo Arms knife you have the ability to change or replace the handle scales by simply unscrewing the two torque screws on the handle.
This is something a few more manufacturers should consider offering I think.
Or is it just me? I like changing my knife handles from time to time!
The whole knife is weighted handle heavy and is well balanced on the first finger choi point.

Straight out of the box it comes nice n sharp, in fact, it was sharp enough to shave a few hairs on my arm - so that'll do for me.
Steve

Sheath
Now the sheath is 'interesting'... It's nylon, well stitched and fits the knife very snugly. Its also got a reinforcing 12mm x 3mm leather spine sawn in edge side.
Some of the stitching is a bit scraggy, but I think that's typical of these type of sheaths these days.
Either way, it does not interfere with the sheath itself.
There's an additional piece strapped to the front of the sheath, which, I can only assume, is for a fire starter or possibly a sharpener?
Finally the knife is held firmly in place with a further nylon strap and Velcro which goes across the handle.
Full Review Of My 'Best Value For Money Bushcraft Knife'
My Final Thoughts -
I would genuinely expect to pay anything up to £50 or even more for a knife of this quality, and I have nothing but praise for the designers and manufacturers.
It really is a superb knife and was a pleasure to test out.
as you saw in my test video, it handles everything with ease and has certainly made it's way up to being one of my favourite knives.
And the price - Unbelievably, it's under £10
This is a preppers 'Must Buy' bit of kit
Plain Blade - under £10
Blade With Gut Hook - under £13
Keep updated with all the latest prepping news and information
* Enter your name & a valid Email address
* You will receive an Email titled 'Preppers Newsletter Subscription'.
* Simply confirm to have access to our regular newsletter and also get your free PDF copy of: 'Beginning Prepping'
Basic Food Storage For Prepping
When you start prepping, one of the first priorites is building up a food supply
We all have a certain amount of food stored in our cupboards in the kitchen. Some may have a larder that gives extra shelving and room for a lot more supplies to be stored, but how long would these food supplies last you in an emergency?
Now most of us have a fridge that's generally stocked up with enough provisions to get us by for a couple of days, maybe a week at a push.
Then there's the freezer. That's normally stocked up to some level. Traditionally there will be a few scraggy odds and ends tucked away at the back, but at least there's something there as a backup.
And, of course the good old neglected freezer.... That looks like a scene from Titanic with bits and pieces of food stuck to slabs of ice.

Is this like your freezer..!

Well folks, if that is genuinely all you have stocked up in your house, your in for a big shock when the SHTF.
I can say with pretty much 100% confidence that the vast majority of UK citizens have a painfully small amount of food stored in their homes for even the most basic emergency situation.
Also consider that the food you currently have may well have to feed you AND your family - that being the case, your stuffed...
The stash you currently have will diminish in record time and then what?
The smug answer is, "Well, I told you so".!
You should of been prepping and building a food store long ago. Basic food storage for prepping is not difficult, and it's also not too expensive if you do it bit by bit.
But for any prepper, food storage is definitely one of the very first priority requirements to add to your 'to do' list.
There is now a system of supplying the public with their supermarket food based on 3 days of food stocked.
Simply put, this means if the supply chain were to break (and there could be literally 100's of reasons for this to happen), but whatever stops even a small part of this 3 day restocking process, we would all see empty shelves in our supermarkets within days.
Maybe less if there's a massive disaster.
The good old British public would go bat shit crazy and buy anything and everything they could get their hands on probably within hours, let alone days.!!
All supermarkets operate the 3 day restocking
So What You Waiting For.????
Do you really want to join all those those crazy people, running around like a headless chickens, fighting and trying to buy a can of beans.!
Of course you don't, so there's only one thing to do - start prepping and build up good supply of foods that will feed yourself and your family for months and possibly years.
It's not difficult. Providing you stick to a few simple rules you'll be fine. Here's the simple guidelines for food prepping:
- Packing and Storage are essential for long shelf life
- Always have a good supply of base level foods
- Keep good supplies of lifelong foods
- Flavourings are essential
- Ensure good food rotation and restocking records
- Always ensure you have more than on food cache

"Fast Tracking" your basic food storage for prepping
For anyone who want to build up a decent stash of long life foods there's one very simple and easy way to do so.
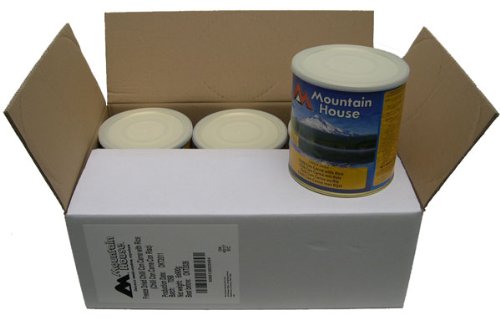
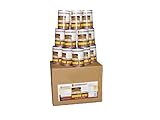
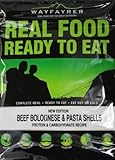
Namely, buy yourself some of the ready prepared, long shelf live and sealed emergency packs like the ones shown here >
This 'fast track' method can be a very good way to build your supplies quickly and safely. Although I would say there are cheaper methods as a typical 1 months supply like this one will cost you around £155.
Now that may sound expensive, but you have to consider there's enough food to keep you going for a month - in fact, having tested the Mountain House range, I would say you could make it last double that.
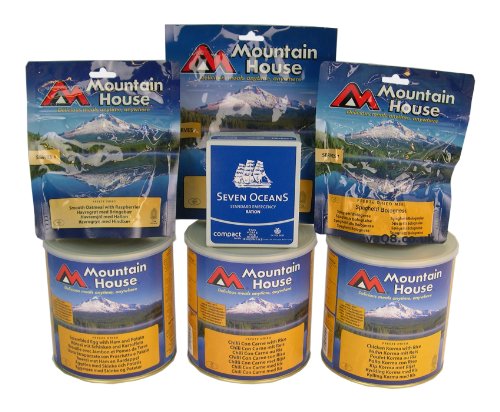
One of the biggest pluses is the fact that the product is given a minimum 25 year shelf life.!
Of course they offer a lot more than just a one month pack, with a 2 and 4 month pack available, I would also add that you would be looking to make these last a lot longer as well.
Two month supply costs around £250
Four month supply costs around £465
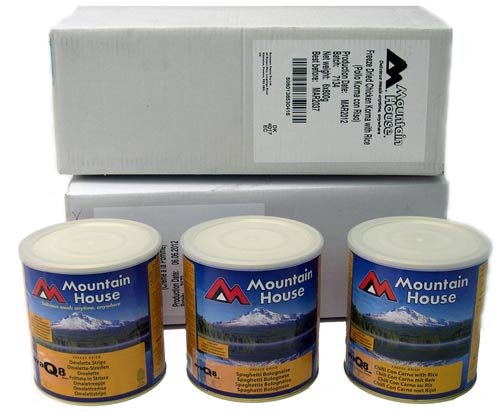
The Mountain House 'fast track' route is OK for some people and will definitely give you a boost in your survival food supplies.
It's well worth considering. Maybe even the odd box if you can afford it at the time.
But build your own "personalized" food stores as well.
Steve Hart UK Prepper Guide
Certain foods cannot be ignored in your food supply store.
CLICK THE TABS TO SEE WHAT IS ESSENTIAL
- essential
FOODS - personal
FOODS - luxury
FOODS

Basic Food Storage for Prepping means you can still store all your treats

- Chocolate Chips
- Chocolate bars
- Nuts
- Raisins, Dried Apricots
- Poppy Seeds
- Cookies
- Granola Bars
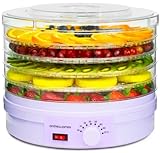
There's an easy and simple way to give chocolate and other treats a good 2-3 years extended life, without loosing any taste or flavour.
This type of storage is easily achieved by using a vacuum sealer like the unit shown here >
These vacuum sealer are an excellent way to ensure you have a big supply of foods, but in a small compact size.

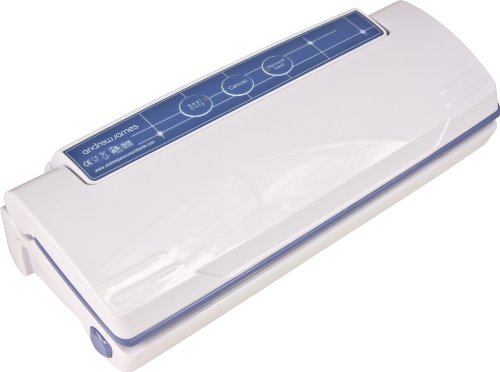
Vacuum sealing you food will add years to its life and is a really cost effective way to store your prepping supplies.
Your food storage methods are important
Storage is an essential part of keeping everything fresh and is as important as any of the methods you use to help preserve and increase the shelf live of you stores.
For the best results you must keep your supplies in a dry, cool and sun light free area - a cellar is the ideal place to do this.
However, most people do not have cellars these days, so you have to compromise.
Even in the smallest of homes you will find somewhere to store extra food - and remember, you don't have to put everything in one place.
In fact it's better to spread this around a bit throughout your house.
COOL , DRY & SUNLIGHT FREE
These are the three essentials for longer term storage - changes in any of these three can spoil you supplies and cause them to go rotten.
At the very least they will reduce their shelf life if exposed to these conditions for extended periods.
DATE ROTATION
Everything must be date marked. Cans and packets that have been bought will come with a use by date - but that date is always less than the actual length of time you can safely use the product.
It's simply a safety factor. I personally have tested out cans of beans that were twice the out of date mark and they tasted fine.
As a rule keep the longest date mark to the back of your stock and when a product at the front become within a year of its use by date, I simple use it.!
Then restock with new cans putting then at the back of the shelf.
This type of food store rotation is necessary for good control of you supplies.

A small cupboard can be ideal

A garage is another good choice

PACKAGING
When your storing products that are not in tins or wrapped only in paper (sugar bags for example). Extra precautions should be taken – put them in MYLAR BAGS WITH 300cc OXYGEN ABSORBERS this will help keep them dryer and moisture free.
Don't forget that any basic food storage for prepping includes removing all unnecessary packaging, especially cardboard.
There's certain little bugs that just love to infest and eat the glue and cardboard packaging.
Basic food Storage For Prepping
The Most Essential Foods To Store
Canned Liquid Food.
Don't overlook the high importance of canned foods with a high liquid content.
Some examples of good nutritious canned foods that are also high in liquid contents are:
- Soup - all types
- Pineapple juice - chunks of pineapple in a natural juice
- Vegetable juice
- Condensed milk, evaporated milk or coconut juice
- All types of vegetables in water or juice
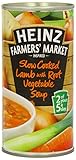
Canned soup is the ideal food for nutrition and liquid
- Buy storing canned foods with high liquid content you will also eliminate the need to add any of your precious water supply to the pot when cooking.
Dehydrated & Powdered Foods.
By storing dehydrated foods you will save on storage space and also money if you dehydrate your own foods.
Remember that milk is also a form of dehydrated food and is one of the best high nutrient foods for our body.
Powdered milk has many cooking uses and is a flavour enhancer to many other drinks.
Canned and dehydrated milk is very cheap and easy to store, and will last a good couple of years and more.
- Powdered milk can be added to many other foods to make good, nutritious meals and desserts like rice pudding.
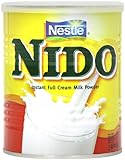
Six, 400 gram tubs for £22 - these will last a very long time.
Rice
Buy rice in bulk - you will save a ton of money and it just makes sense.
It's so easy to store and will stay fresh for years, especially if you keep it nice and cool and in a dry place.
There's hundreds of rice recipes and it can be added to just about anything to give bulk.
Being a carbohydrate, there's the added energy stores it will give you as well.
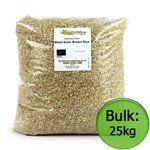
A 25kg bulk bag of rice will give you over 500 servings.!
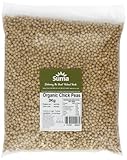
Beans - chickpeas, lentils, garbanzo
The same principle applies to beans as it does rice - buy beans in bulk - again, you will save a ton of money and it just makes sense.
Beans will store and will stay fresh for years and can be an added source of extra vitamins and minerals needed to bulk up any meal.
There's hundreds of rice recipes and it can be added to just about anything to give bulk.
Being a carbohydrate, there's the added energy stores it will give you as well.
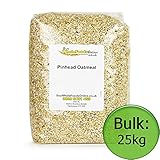
Oatmeal
A traditional main stay food - oatmeal is very easy to store and requires no more attention than rice and beans.
A few of these in your store and your breakfast is guaranteed.
You should easily get at least 100 breakfasts from a 25kg bulk bag which represents great value for money.
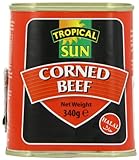
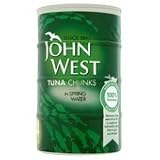
Canned & Dehydrated Meat
Of all the basic food storage for prepping, storing meat is possibly the number one food to add to your supply.
You have to consider that meat will provide you with around 90% sustenance needed for you to survive.
I would also include tinned tuna in this canned meat section as being a number one food to store.
The mainstay of canned meats are Beef, Chicken, Tuna and then Ham or Spam.

Dehydrated meats
Don't forget, just about all meat can be dehydrated, in effect leaving you with delicious meat jerky.
By using various methods to remove the moisture your are left with a highly nutritious food that will keep for many months.
The principle behind jerky is to remove the water and moisture in the meat, thus rendering it uninhabitable for bacteria - germs cannot grow without moisture.
Smoking will add flavours to you meat, as well as marinating in various recipes.
But, in all honesty, I have found the easiest and simplest way to make my own meat jerky is using a simple dehydrator.
Obviously you can also use your dehydrator for many other foods and it works very well.
For jerky I have used cooked meat and cut into very thin slices before laying out to dehydrate.
I have also use a beef mix with my own 'secret' recipe and put it into a piping bag and spread it out along the trays.
Either way the results were good.
I always vacuum seal and date the jerky before adding to my store.
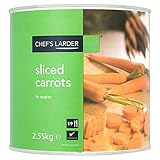
Canned Vegetables & Canned Fruit
When it comes to vegetables then think about canned root vegetables, like sweet potatoes or yams.
Canned sauerkraut, cabbage, carrots, peas, mushrooms or even beets.
These will all add substance and nutrition to your survival meals.
Canned goods have a very good shelf life, 2 years plus and are very easy to store. Probably the biggest advantage to stocking canned veggies and fruit is their low price.
It's easy to build up good store of varied foods for very little money.
- Remember this, before stocking up your canned veggies - canned fruits contain almost double the the calories per pound as veggies.
Canned Fruits will also give you more liquid content and the citrus fruits add higher amount of vitamin C as well.
Essential for your survival meals.
Packet meals
Ready to eat packet meals offer you ready made food as and when you want it.
No messy about preparing meals - just add water. These are worth thinking about although they are a bit expensive compared to doing it yourself.
I would also definitely add packets some dried potatoes.
Mr Mash or Smash are my favourite. Again they are long shelf life being dried foods and will add bulk and calories to your meals.
Don't Forget The Small Stuff
- Protein Bars & Protein Drinks
- Coffee, Tea, Hot Chocolate
- Olive Oils
- Raisins & Dried Fruits
- Salt
- Jams & Jellies
- Nuts & Seeds
- Sugar
- Spices & Herbs
- Honey
And finally - get familiar with you food...
Don't just buy and forget. Get used to the foods you have stored. Get use to cooking with them and making up meals from specific items in your store.
You can almost think of you prepping store as one big larder that you use alongside your main kitchen cupboards.
Experiment and test out the best ways to prepare meals using only stored foods. If you can do this, then your well on your way to being fully prepared.
There are many ways to preserve and build up a food store.
Don't get caught out - get prepared first by using the methods I've shown you above, you'll soon have the peace of mind us prepper have.
Happy Prepping Folks.
Steve
Keep updated with all the latest prepping news and information
* Enter your name & a valid Email address
* You will receive an Email titled 'Preppers Newsletter Subscription'.
* Simply confirm to have access to our regular newsletter and also get your free PDF copy of: 'Beginning Prepping'
After the SHTF you will need to communicate
a CB Radio For Preppers is essential kit
Having a CB Radio could save your life

When you think of emergency communication, the first thing that comes to mind is Ham Radio, in fact it has always been considered as the first choice in any preppers survival plan.
You can quite easily transmit around the world with a ham radio but it has its drawbacks which make it generally unsuitable for us preppers.
Setup costs are high, you will also need a special license as well as being pretty clued up on the whole ham radio operating system. All of this is time consuming and costly, and when you add it to all the other prepping activity it becomes more of a pain than a help.
If you have the time and money - then the ham radio is the first choice. But looking at it sensibly, there is an equally good, and far easier and definitely much cheaper way to ensure communications with others would still be possible.
Why is a CB Radio for Preppers such a good idea?
The CB Radio has been around for quite a while now. In fact it was made popular back in the 70's when it was first seen on the big screen in the film 'Smokey and the Bandit'.
Since then it has faded out of popularity a lot, especially with the introduction of the trusty mobile phone.
Now, although your mobile is a good communication device. It only works well under certain conditions.
Namely, when the transmitting towers are able to forward signal, when the phone is active and when there is acceptable line traffic.
If any one of these breaks down, you mobile phone is useless.


No mobile signal or internet spells disaster
In a SHTF scenario it's pretty much a certainty that mobile phone calls and texts will overload the system and cause it to crash.
If the power grid were to fail as a result of a major disaster then all mobiles would loose signal and, potentially, even worse, the internet would go down as people try to find out what is actually happening.
Without doubt, the internet, and namely, social media will be able to report the exact situation far more quickly than the national or world news networks as people Tweet and Facebook about what's happening to them and where.
With no phones & no internet - how do you communicate?
- TALKING - good old fashioned talking will get you some local information, but not a lot more. The neighbours in your general area will know something but chance are it wont be much use helping you find out the big picture.
- RADIO: using a battery powered radio will allow you to hear any news messages that may well help in a disaster situation. At least you will know something! The batteries will, of course, run down very quickly when you are hungry for information and busy scanning the airwaves hour after hour. *always ensure you have this essential bit of kit, namely, a solar or wind up radio.
- HAM RADIO; as I said earlier, if you have the time and money to invest in ham radio then it's definitely worth while. But remember, ham radio enthusiasts are not preppers. It's their hobby, it's not equipment they have just added to their survival kit.
- CB RADIO; now we are talking! The CB Radio For Preppers is a must have survival tool, with literally thousands up and down the United Kingdom.
They may not all be in use right now. But I'm dam sure they'd all come 'on-line' if there was no other means of communication. .
A message or information can be passed from one end of the country to the other very easily via the network of CB users, whether preppers or just normal people who own one.
THE CB RADIO IS NOT A TOY

- Cheap to set up and run - a good setup will be less than £100
- No special license required. No test or certificate
- Range 5 - 25 miles. Average 5+ but well set up you'll get 25+
- Very easy to operate - simple dial with 80 channels
- 40 chnls AM & 40 chnls FM
- Only required a 12V DC power supply with up to 8watts output
- Compact size - most are smaller than a car stereo
Interestingly, a CB Radio is exempt from the UK mobile phone law - this means, you are OK to use a CB Radio in your car, it is not illegal. However, if you are found to be using it and cause an accident you will get done for dangerous driving.
What are the basic features needed in a CB Radio For Preppers?
Generally speaking you will find that CB Radios will come with a host of different features, all designed to make life easier for the operator - but, the more advanced the features you have, the more you will pay.
Quite often you really don't need all of the fancy gizmos..!
Some features are there, but built in and automatic rather than relying on you to turn a switch and set them yourself.
An 'auto squelch' filter is quite common and will help give you a clearer message, but sometimes it's just knob operated.
Here's a list of some of specifications commonly advertised >

Common channels used with CB Radio For Preppers
Channel 09 is the universally accepted emergency channel for all CB users.
However, it would seam that channel 03 is also the universal prepping channel for all sorts of things, including emergencies. .
Other channels that have been allocated to various sectors are:
Channel 4 & 16 - used by 4x4 clubs
Channel 17 - general truckers channel
Channel 19 - general open channel
The CRT S-MINI
Here's a typical, good basic setup that is an excellent entry level CB with all the necessary features a prepper would need.
In a nice compact 180mm x 123mm x 38mm size, this CRT S-MINI is great value for money at around £55.
You can also get the CRT S-MINI VEHICLE BUNDLE KIT WITH KM65 AERIAL ANTENNA + MAGMOUNT which costs under £65.


So if you haven't got one, I would suggest you give it some serious thought.
There not just for truckers or geeks. They are a genuine bit prepping equipment.
Having the tools to help you survive are what prepping is all about and a CB Radio For Preppers just makes perfect sense to me - it's yet another lifeline.
Typical CB radio types and specifications you can buy today;
COBRA
Good quality starter level CB @ under £55
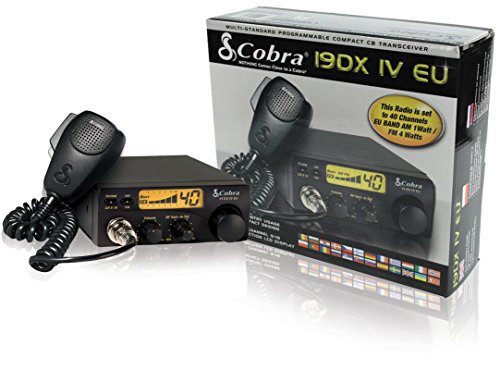
- TX/RX signal display
- EU multiband
- Bar graph S meter
- Squelch / RF gain
- Power meter
- Instant chn 9 & 19
ALINCO
Higher end CB costing around £165

- Multi channel
- AM/FM
- Quick channel up/down
- Scan
- Remote locking
- PA capability

- Frequency range 28000-29700
- 6x60 channels
- PA function
- Adjustable power output
- Noise Blanker and ANL Clarifier
Keep updated with all the latest prepping news and information
* Enter your name & a valid Email address
* You will receive an Email titled 'Preppers Newsletter Subscription'.
* Simply confirm to have access to our regular newsletter and also get your free PDF copy of: 'Beginning Prepping'
What are the Top 10 Prepping Mistakes every Prepper makes?
Don't fall into these basic Prepping errors
There is literally thousands of pages of information about prepping on the internet today. This makes joining the prepping community easier than ever.
If your a newbie prepper it is very easy to fall into an information overload trap and get the red mist about prepping and all the equipment you must have.
My advice to any newbie is to try and find as much information as you possibly can before making any decisions. And find out even more if that decision includes making a purchase for some new gear.
There are probably dozens of simple mistakes to be made, but, in this post I want to add my take on the Top 10 Prepping Mistakes, from a perspective of my 20 years plus experience of being a prepper.
Top 10 Prepping Mistakes
- Always think twice before taking advice.
With so much information available for us preppers, both old seasoned preppers and newbies, you can easily fall into the trap of believing all your read it true.
To some extent it may well be. But is it correct for you?
Is that advice really relevant to your needs and requirements?
After all, the only one who knows about what suits you, is you.!
So be careful of all the prepping 'experts' who recommend this and that - it may well not be right for you.

- Build up a false store.
I have lost count of the number of newbie prepper who build up a good supply of very strange looking survival foods by listening to what others say they should eat.
Do not fill your store with unfamiliar and unusual foods just because the 'prepping food guru' said you should.
If you like something, and it's got a reasonable shelf life, then buy it in bulk and store it - you'll eat it then.
If the food is some strange far fetched seed mixture that you wouldn't even feed to your budgie, then leave it alone.
- In far to much of a hurry to bug out.
An almost unstoppable insistence to bug out has hit the prepping community hard, and it's easily one of the top 10 prepping mistakes most preppers fall into.
There's far too much talk about the need to bug out and run away.
We are in the UK. A country with 65 million people packed into a very small space.
You read a lot of bug out plans from overseas in America where they have literally thousands of square miles of wilderness.
That's just not the case here in the UK, we simply do not have the space.
By all means prepare for a final escape and a full on bug out. But making it the be all and end all of survival plan is not a good idea.
You home is your castle, and generally most preppers will agree to making that the first choice in a disaster situation.
Hunkering down at home offer far more survival chances than just running away. If you can ride out a disaster situation at home with a full supply of food and equipment, then that has got to be your first choice.
- Just far too technical.
The phrase that comes to mind here is: "The lights on, but no ones at home"!
How many times do we see preppers buying loads of gear that's just far too technical and quite frankly unnecessary.
Survival is a mixture of old fashions bushcraft skills enhanced with modern technology. It is just so important to learn good bushcraft and survival skills. They kept our ancestors alive for century's, so ignore them at your peril!
Learn these skills and then see what modern gear is available to make that task easier. If the modern method fails, your always have your old skills to fall back on,

- Prepping for one single event.
The chances of one single disaster causing a total world wide meltdown are very unlikely.
Not 100% unlikely, but near enough.
But preparing for that one event is, quite frankly, stupid. You cannot see into the future.!
Granted, you can way up the percentage of chances of a certain disaster happening, but this will change on a daily basis.
There are just so many factors that make one disaster more or less likely.In fact, no one knows, what, when or where a disaster is likely to occur.
The clue is in the word "Prepping". You are getting ready to survive. Ideally to survive any scenario. Of course, any scenario, is just not possible, but as many as you realisticly could.
In fact, 75% of prepping is done at a core level, covering nearly all survival factors. Learn the basics of survival any you almost there.
- Failing to store basic foods.
With companies selling food packs that offer 10 year plus self life it's easy to see how many prepper fall into this trap.
But again, I go back to the fact that you must have a good knowledge of survival and bushcraft skills to compliment your modern equipment and gear.
There are certain 'must have' foods that will make your survival life so much easier - most have an almost unlimited shelf life if stored properly.
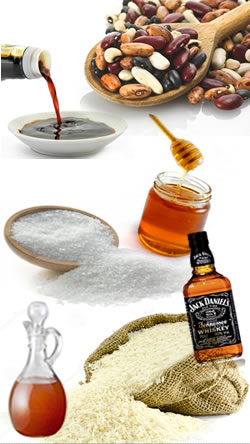
Honey, vinegar, sugar, alcohol, corn starch, salt, rice, dry beans, soy source, to name but a few.
These basic foods have more uses than just for cooking and can be a main stay for long term survival.
Go fancy and buy the big bulk food packs by all means, but never forget the basic 'old time' survival foods.
- Prepping for your pets
A bit of an unusual one this, but most of us think of our pets as members of the family, and as such, should be considered when planning for any disaster.
Having a dog is a very good means of defence and an early warning system for intruders or anyone who make be looking for an easy target to steal food and water from.
Don't neglect them - ensure you have good food supplies for them to carry on their job of protecting you. - Failing to put yourself first.
As the 'man/woman of the house', it's your duty to be able to take control of the situation to ensure all the supplies and equipment are the best you can have.
It's your duty to know how things work and to do stuff.
So if your 'man down', everything will be affected. You have to put yourself at the top of the tree and ensure you are looked after first.
This means you must have enough supplies to keep yourself going.
By this I mean keeping yourself fit and healthy. The only way to do this is to have sufficient supplements and medication for you to keep going. Don't overlook your own health.
If you take medication, and need it on a regular basis, you must build up your own personal stocks .
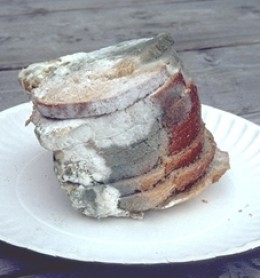
- Badly stored food.
In order to store your long term food supplies, you must adhere to certain storage rules to get the every best results.
There are lots of ways to make your own survival foods but, ignoring the basic storage rules can very easily result in spoiled foods , making them useless and totally uneatable.
There are six rules to ensure good, long term food storage.
Temperature, Oxygen, Moisture, Light, Time and Pests.
Any one of these goes out of sync and you can have big problems that will compromise your whole survival plans.
Check your stored foods regularly. Rotate and use if dates get less than a few years.
- Far to much reliance on yourself.
You simply cannot do everything on your own. Trying to stay fully under the radar and doing everything by yourself is a recipe for disaster in the long term.
As you progress through your prepping life you will come to realise that you lack certain skills and abilities that others have in abundance.
It's not a failure. You cannot be everything to everyone. But this is one of the top 10 prepping mistakes that's a real common one, as relying solely on yourself to survive a disaster has a very high failure rate, and a good chance you'll fail miserably.
By sniffing out other like minded survivalists, your whole prepping and survival world will open up.
You will be amazed at what other preppers have to offer you.
as well as that you will also be amazed at the skills you can offer them.
Remember, not all men are born equal..!!!
To Fully Succeed - Join a Preppers Group.

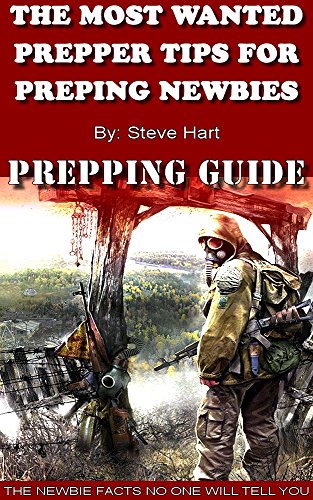
Recommended reading for preppers
This Ebook covers all the basic mistakes a newbie prepper will make.
It goes over essentials and non essential equipment with those little details that most people wont tell you.

Superb read, well written and very interesting. Well recommended
Amazon Buyer
Surviving and learning how to keep alive can take years.
So can prepping for a disaster - do it right from the start and always keep to the key basics.
You wont go far wrong then......
Happy Prepping Folks.
Steve
Keep updated with all the latest prepping news and information
* Enter your name & a valid Email address
* You will receive an Email titled 'Preppers Newsletter Subscription'.
* Simply confirm to have access to our regular newsletter and also get your free PDF copy of: 'Beginning Prepping'